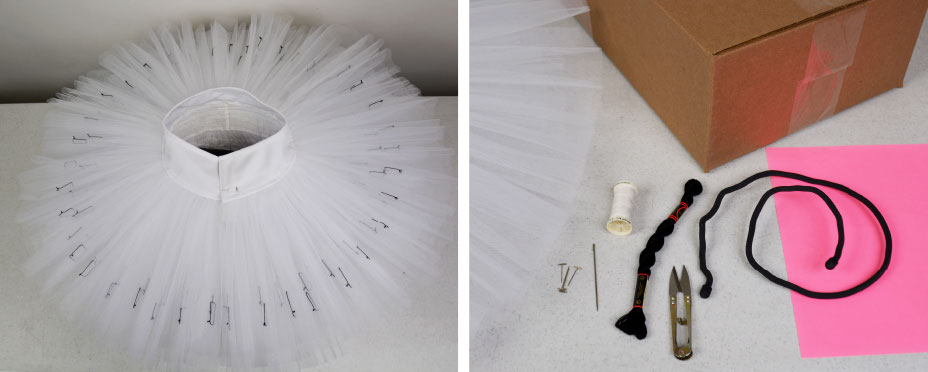
Why a Classical Tutu should be Tacked or Hand-Tied
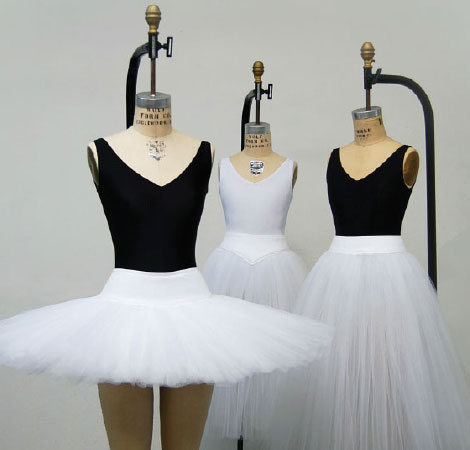
When a dancer performs in a classical tutu the layers have a tendency to fly away, in order to keep a perfect, flat shape the tutu the layers are either tacked with plastic gun tacks (we offer this as an added option on our C700 & C709 Tutus) or they can be Hand-Tied.
Hand-Tying is very old technique used in tutumaking that requires time, patience & practice. When done well it can create the perfect classical tutu silhouette, not too flat and not too fluffy. With each hand-tied stitch you can manipulate the balance of the overall tutu, wether you are trying to create a perfect platter or a soft fall from the hip.
How to Hand-Tie (Tack) Your Tutu
What you will need: An extra long 3-4" sewing needle, strong thread (ie. double regular thread, quilting thread, embroidery thread, etc) in a matching color to your tutu (we used a black thread ONLY to better show the stitching pattern), some straight pins for keeping your tutu closed if you have not put on your hooks and bars yet, scissors or thread clippers, a piece of colored paper to put between the layers as a contrast, a long ribbon, string or jumbo bungee cord to hold the top layers together out of the way and a box to set the tutu on so that you can work over and under the layers.
Notes: We used Black Thread SOLELY for the purpose of this tutorial - the thread should MATCH the color of the tutu.
The tutu that we used is a 10 layer, instructions for an 8 layer tutu ARE in parenthesis.
We label the layers 1-10 (8) with layer 1 being the longest top layer at the basque and layer 10 (8) being the smallest bottom layer at the panty.
Step 1:
- Close tutu in the back with either the pre-sewn hooks and bars or pins. Flip tutu upside down on a clean flat surface with the center back facing towards you.
- Beginning on the left side of the center back opening, place the colored paper under layer 9 (7) so that you can clearly see layers 9 & 10 (7 & 8). Thread needle with a long strand of thread with no knots.
- Holding layers 10 & 9 (8 & 7) push the needle down thru both layers close to the panty and back up making a stitch approx 1.5" long. Pull thread so layers are held together flat but NOT too tight, double knot & clip ends.
TIP: The individual ties should be tight enough to hold the layers together with a bit of movement in between but not slack enough that the ties hang down when the tutu is right side up.

- Repeat this same stitch & knotting technique moving clockwise around these 2 layers and placing ties approx 2" apart.
Step 2:
- Beginning on the left side of the center back opening, place the colored paper under layer 7 (5) so that you can clearly see layers 7, 8 & 9 (5. 6 & 7). Thread needle with a long strand of thread with no knots.
- Holding layers 7, 8 & 9 (5. 6 & 7) push the needle down thru layer 9 (7) catching all 3 layers and come up making a stitch approx 2" long.
- Pull thread so layers are held together flat but NOT too tight, double knot & clip ends.
- Repeat this same stitch & knotting technique moving clockwise around these 3 layers and placing ties approx 3" apart.
Step 3:
- Flip tutu right side up and set on an elevated surface (like a box) so that you can work above and below the tutu with the center back facing you.
TIP: put a weight (ie: a book, a water bottle, etc) in the panty of the tutu so that it doesn't move around as you are working.
- Tie up layers 1, 2 & 3 (1 & 2) with either a ribbon, string or bungee cord so that they are out of the way.
- On the left side of the center back opening grab layers 4, 5, 6 & 7 (3, 4 & 5). NOTE: Layer 7 (5) will be connected to the under layers that were just done.

- Make a large 2-3" long stitch approx halfway out from the panty to the edge of net thru all 4 (3) layers. NOTE: If working on a hoop tutu make sure that stitch includes the hoop.
- Pull thread so layers are held together flat but NOT too tight, double knot & clip ends.
- Repeat this same stitch & knotting technique moving clockwise around these 4 (3) layers and placing ties approx 3" apart.
- You will notice that with every new row of stitches you are catching the last layer done with the previous row.
Step 4:
- Remove 2 (1) layers from the top and re-tie the top layer up out of the way.
- On the left side of the center back opening grab layers 2, 3 & 4 (2 & 3). NOTE: Layer 4 (3) will be connected to the layers that were just done.

- Make a large 2-3" long stitch approx two-thirds out from the panty to the edge of net thru all 3 (2) layers.
- Pull thread so layers are held together flat but NOT too tight, double knot & clip ends.
- Repeat this same stitch & knotting technique moving clockwise around these 3 (2) layers and placing ties approx 3" apart.
- You will notice that with every new row of stitches you are catching the last layer done with the previous row.
Step 5:
- Remove the tie on the top layer and smooth down.
- On the left side of the center back opening grab layers 1 & 2 (1 & 2). NOTE: Layer 2 (2) will be connected to the layers that were just done.
- Make a large 2-3" long stitch approx 3/4 out from the panty to the edge of net thru the 2 layers.
- Pull thread so layers are held together flat but NOT too tight, double knot & clip ends.

- Repeat this same stitch & knotting technique moving clockwise around these 2 layers and placing ties approx 3-4" apart.
- You will notice that with every new row of stitches you are catching the last layer done with the previous row.

